 Jan
27
Troubleshooting Bacnet MSTP traffic with Wireshark
- January 27, 2018
- 0 Comment(s)
When it comes to debugging Ethernet traffic there are plenty of hardware and software tools to choose from, Wireshark is a powerful example and it its free. When it comes to analyzing MSTP traffic on the RS485 bus the choices are limited. The specialty nature of Bacnet communications plus the tight timing make it difficult for multi tasking operating systems like Windows and Linux to keep up. Bacnet specifies that a device should begin its reply within 15 to 20ms which is near the limit for a PC. Thanks to some creative work by Steve Kargs we can use a normal PC to capture MSTP packets and view them live with Wireshark. The story of Steve’s work is here: http://steve.kargs.net/bacnet/wireshark-and-bacnet-mstp/.
Getting The Hardware:
You’ll need an RS485 port on your PC and a Bacnet device to talk to.
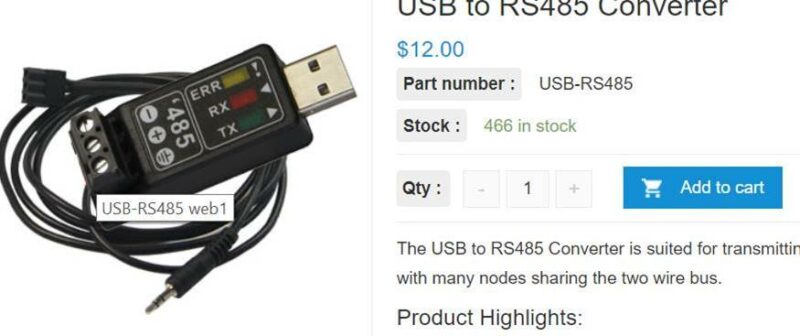
For the RS485 port, we make this low cost USB to RS485 converter. The LEDS are a great help in themselves.
https://bravocontrols.com/product/usb-to-rs485-converter/
You’ll need to install the FTDI driver which is on the product page as well.
And you’ll need a Bacnet device, if you haven’t got one already here’s a $30 device we’re making. Its normal job is a ‘pulse input to analog output’ but you can use it as general purpose I/O with its six universal inputs and six analog/binary outputs. There is a link on the product page to the source code for this product which uses an Arm STM32F103VC processor. With these two bits of hardware you can be up & programming with Bacnet MSTP in short order.
https://bravocontrols.com/product/pwm-input-to-voltage-output-transducer/
Installing Wireshark and the MSTP helper tool
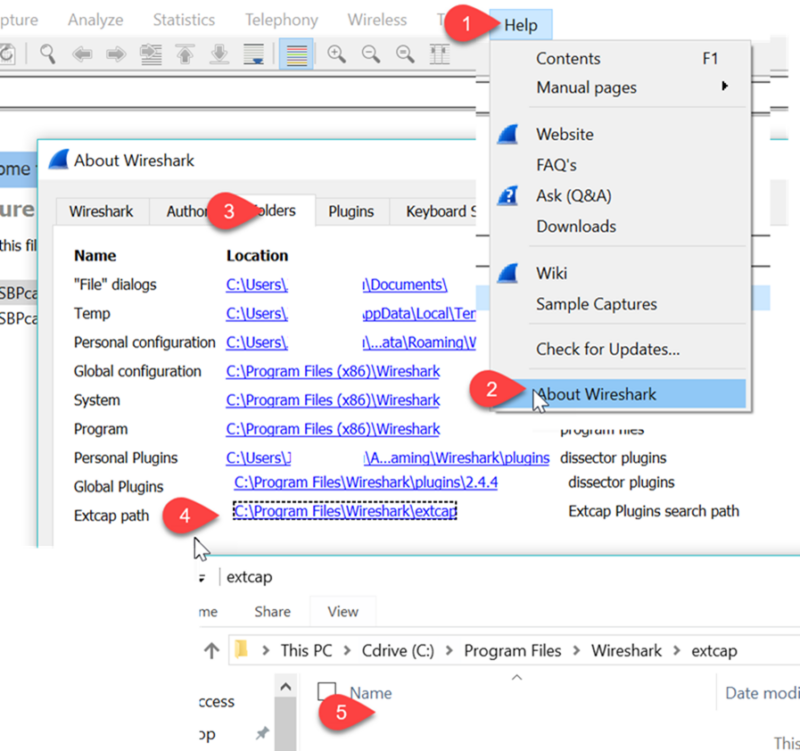
Next install the Wireshark 2.0 packet capture tool: https://www.wireshark.org/#download
Select the default options all through the install process.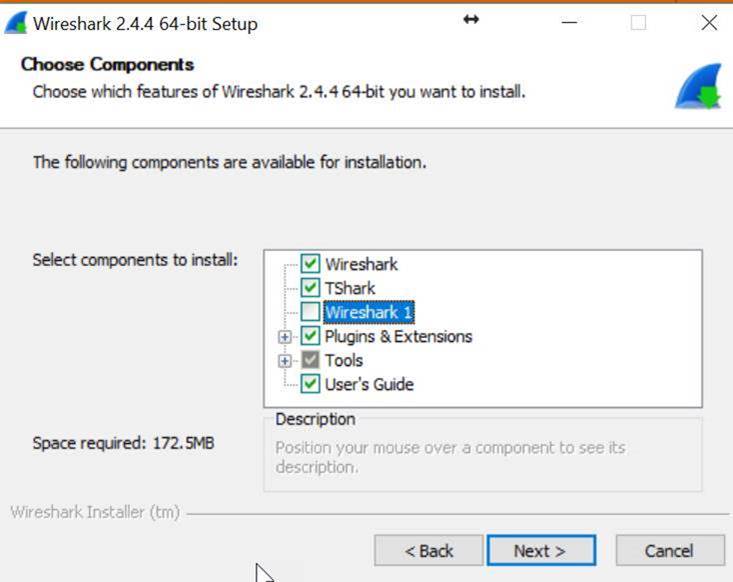
You can click on the link at tab 4 which will bring up the correct folder as shown at tab5.
4.Download and unzip the mstpcap.exe helper file from Steve, it can be found here: https://sourceforge.net/projects/bacnet/files/bacnet-tools/bacnet-tools-0.8.5 . There are many utilities in this zip file, you’ll only need the mstpcap.exe. Unzip the bacnet tools file to a temporary folder and copy the important mstpcap.exe file to the wireshark\extcap folder.
During installation Wireshark asks if we’d like to reboot which I found to be unnecessary, possibly because I had installed this software many times before. Your results may vary.
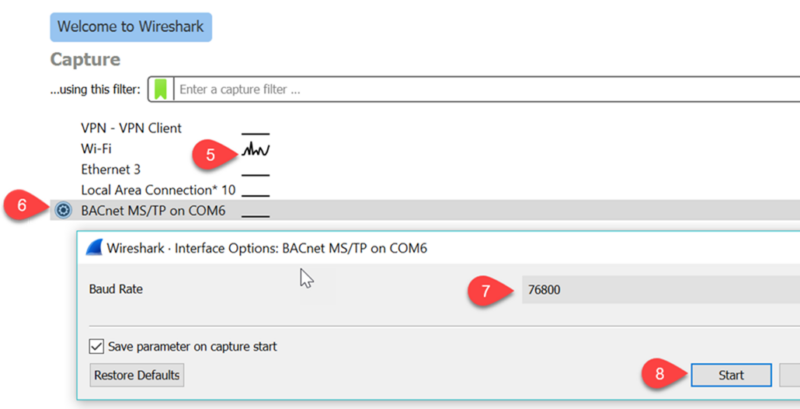
When we first run Wireshark we are greeted with a list of the available communications ports on your PC. There’s a network activity graph at Tab5 which shows some action on the Wifi port so the installation went well.
To see the MSTP traffic we first click the ‘BACnet MS/TP on COM6’ icon at tab6 which brings up a dialog where we can edit the baud rate at tab7. Then start the capture at tab8.
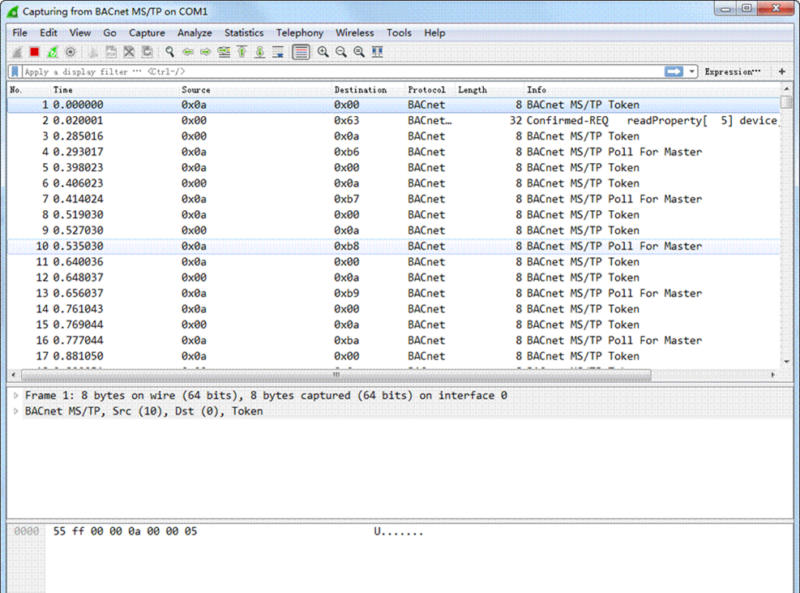
Finally here is the MSTP traffic, this particular capture is from a session on COM1.
Setting Filters In Wireshark:
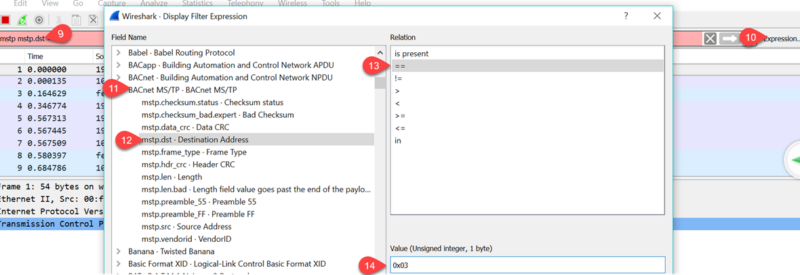
You can home in on the traffic of interest by setting a filter which you edit directly at tab9, here we have set up a simple filter to capture all data going to bacnet ID = 3, ‘mstp.dst == 0x03’ is the syntax. Filters can get complex so there is a dialog to help build the filter expressions by clicking at tab10 which brings up this dialog. Here we’ve selected the Bacnet MSTP protocol at tab11, picked the ‘destination address’ filter at tab 12, selected ‘==’ at tab 13 to pick an exact match and finally entered the Bacnet address ID in hex format, 0x03 at tab 14.
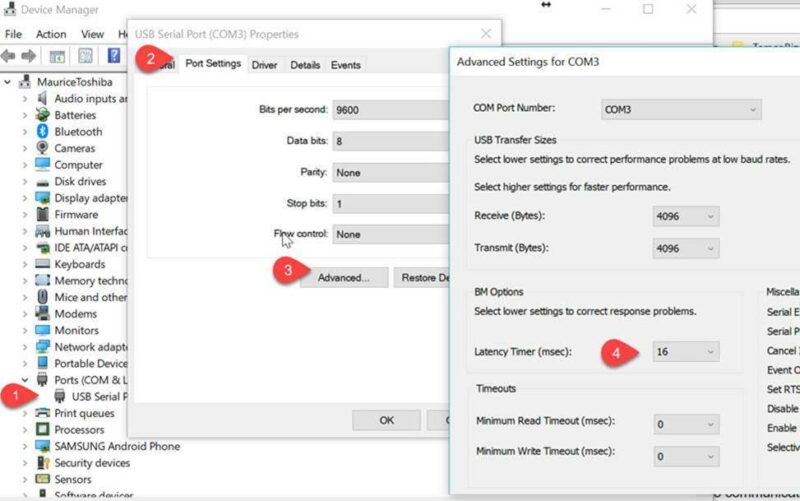
8.If you’re having troubles you can try at different baud rates. My particular setup didn’t work at 78k baud but surprisingly did manage to work at 112k. There is also a setting for the COM port latency which can be found in ‘Windows Device Manager’ under the port settings ->Advanced Settings -> Latency Timer. Here’s the default setting for the common USB com port chip from FTDI which is set to 16 msec, you can experiment with lower settings if the driver supports it.
Other Open Source Tools:
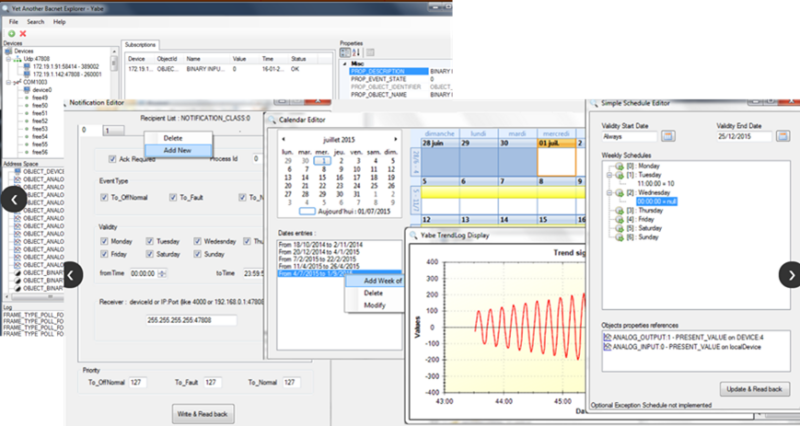
Finally, for higher level debugging of bacnet objects we have the venerable ‘Yabe’ which stands for ‘Yet another Bacnet Explorer’. It is an open source project which is currently maintained by Frédéric Chaxel. It is installed automatically when you install our T3000 software and is available under Tools -> Bacnet Tool. If you’d like to install the tool without installing our T3000 software, here is the link for the Yabe open source project:
https://sourceforge.net/projects/yetanotherbacnetexplorer/
10.And that’s the way to debug Bacnet MSTP traffic without spending a load of money.
Professional Bacnet Tools:
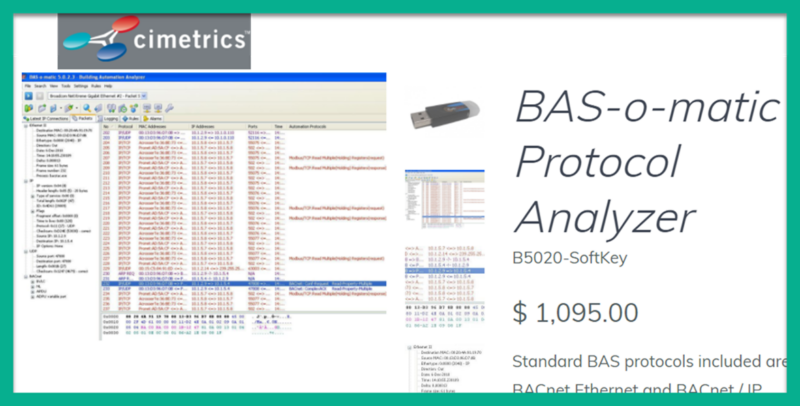
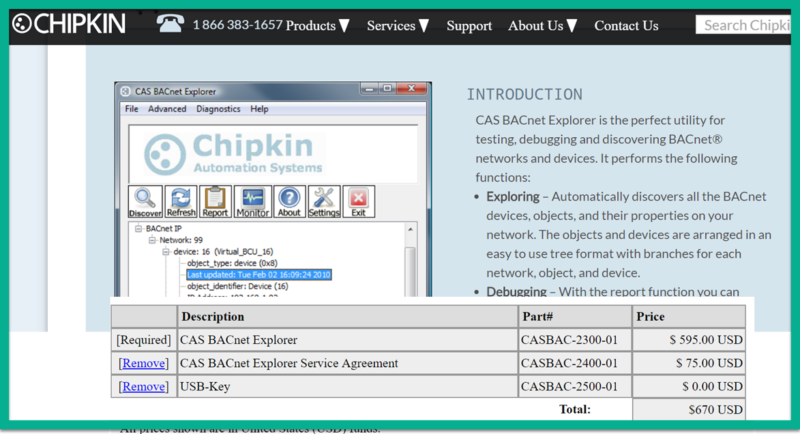
Below are a few popular tools from Cimetrics, Polarsoft and Chipkin which the professional developer or integrator will want to have around. However, they do come at a price as you can see. We purchased the Chipkin Bacnet explorer tool long before the Yabe tool was around and it has paid for itself but the crew here doesn’t use it much now that the features in Yabe have filled in.

